

Dressmaker Sewing Guide: Assist, Speed and When a Seam Goes Wrong
How the Dressmaker sewing stage works, the two settings that make it manageable, a repeatable approach to every seam, and why the game has no skip option.

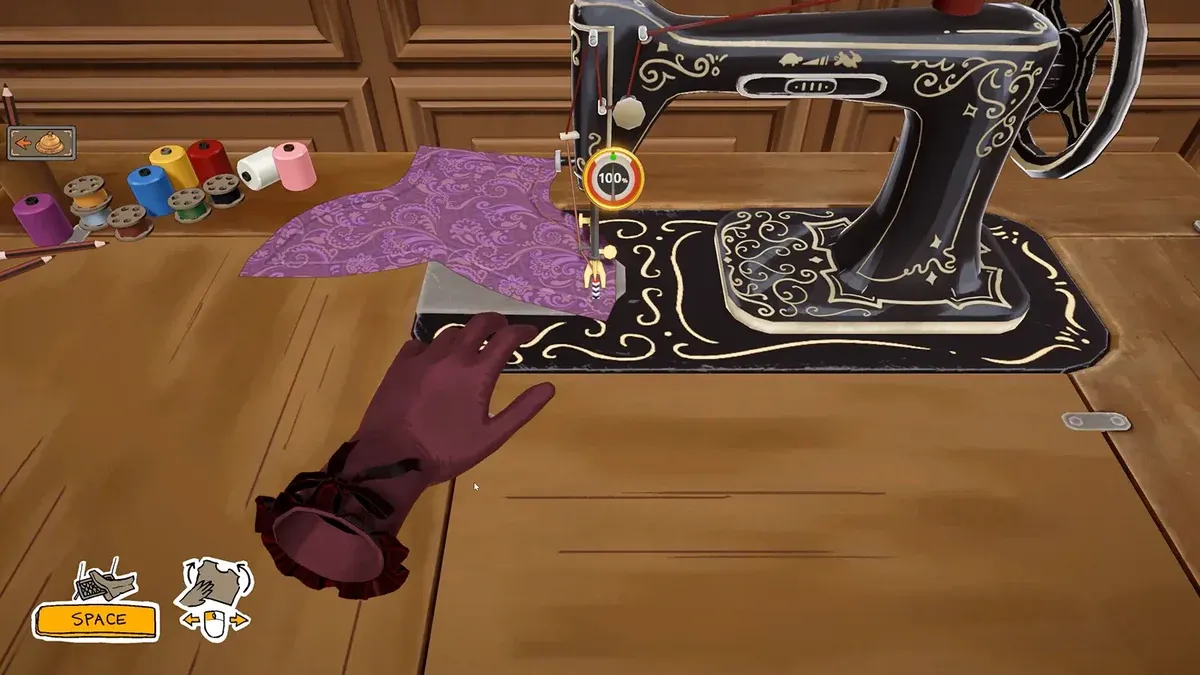
Sewing in Dressmaker means feeding each fabric panel through the machine along a marked seam while the game scores how straight you kept it. Hold the sew key to drive the needle, rotate with A and D or the mouse, and change the machine speed with W and S. There is no skip option and no employee who sews for you. Two settings fix most of that: sewing assist and machine speed. Players who still dislike the stage say so publicly.
The developer has never published a setting guide for this stage. Everything below that is not a settings label comes from creators playing the finished build and from players posting in the Steam discussions and on the subreddit. Where those players disagree, the disagreement is written down rather than averaged away.
What the sewing stage actually asks you to do
Each dress is split into seams. The mannequin view shows the assembled garment and a sew button; pressing it drops you into the machine view one seam at a time. A live readout tracks how closely you follow the line and it visibly changes the moment you drift. When every seam is done you get an overall quality figure for the dress.
A creator who is a real-life costume maker called the stage “pretty accurate”. She demonstrated the controls on camera: space to sew, A and D to rotate, W and S to change speed. She also slowed the machine for the first curved seam and sped it up on the straight runs.
Sewing assist steadies you without sewing for you
The assist option sits in the settings menu. With it on, holding the sew key drives the fabric forward and holds the line for you. One creator’s verdict after testing both ways is the most useful description available: it is genuinely nicer, it is not perfect, and you can still miss the seam. She kept it on for the rest of her session.
A player with a dexterity condition reported the same thing in a Steam review. Before finding the assist she worried the game would be too hard for her hands. Afterwards she found the balance fair, because the assist helps without feeling like cheating.
If you want the assist off, nothing else changes. The stage is identical, only more demanding.
Speed is the setting most players miss
Machine speed is adjustable mid-seam, and it is the single biggest lever after the assist.
- Slow for curves. Sleeve heads and necklines are where the line bends fastest.
- Fast for long straight runs. A skirt panel side seam is a straight line and does not need care.
- Slow down before the last two centimetres. Overshooting the end of a seam is the most common way to lose accuracy at the finish.
One subreddit reply to a complaint about the stage puts it plainly: with the assist on and the speed up, it becomes much easier. Another player argued the opposite side of the same coin in the same thread, that speeding up the machine is exactly how the whole dress gets finished faster. Both are describing the same dial from different directions.
A repeatable way to get through a dress
- Check the assist is on before you start the first seam.
- Sew skirt panels first. They are long, straight and low risk, so they let you settle in.
- Drop the speed for anything with a curve, then raise it again for the next straight seam.
- Finish one group of panels before starting the next. Skipping around makes it harder to see what is left.
- Add accessories only after the dress is complete, because accessories are placed on the finished garment.
When a seam goes wrong
You are not locked in. A sewn panel can be taken off the dress and re-cut at the cutting table, and a whole dress can be restarted. A creator recorded both: she re-cut single panels, then restarted an entire dress twice after a customer rejected it.
The expensive version of a mistake is the one made at the cutting table, where fabric is already spent. The cheap version is a wobbly seam, which mostly costs quality rather than materials.
Why the game will not let you skip it
This is the one openly argued point in the community. A thread on the official subreddit is titled “Sewing should be optional”. It asks for exactly that: keep the stage, add a way out of it, and maybe let the player pay an employee to sew. The replies split three ways.
- Run the settings. The most common answer is assist plus speed, and several players say the stage stops bothering them after that.
- It is the game. One reply argues the title is not a design game; you make the dresses, so every step is the point.
- It is still repetitive. Nobody denies that a dress with many panels repeats the same motion a lot.
The developers have not responded to the request, and the skip option does not appear on their published list of post-launch content. That list does include proper controller support, which matters for handheld players.
Controller and handheld problems are separate from the sewing itself
Players on the Steam Deck describe the game as clunky and specifically mention failing to zoom on the mannequin. The developers said the game runs fast on the Deck and that proper controller support is a planned update. The sewing stage is not the culprit there; the interface is built around a mouse pointer. The Steam Deck page covers what to try. Cutting, grain and quality scoring live on the pattern cutting page.